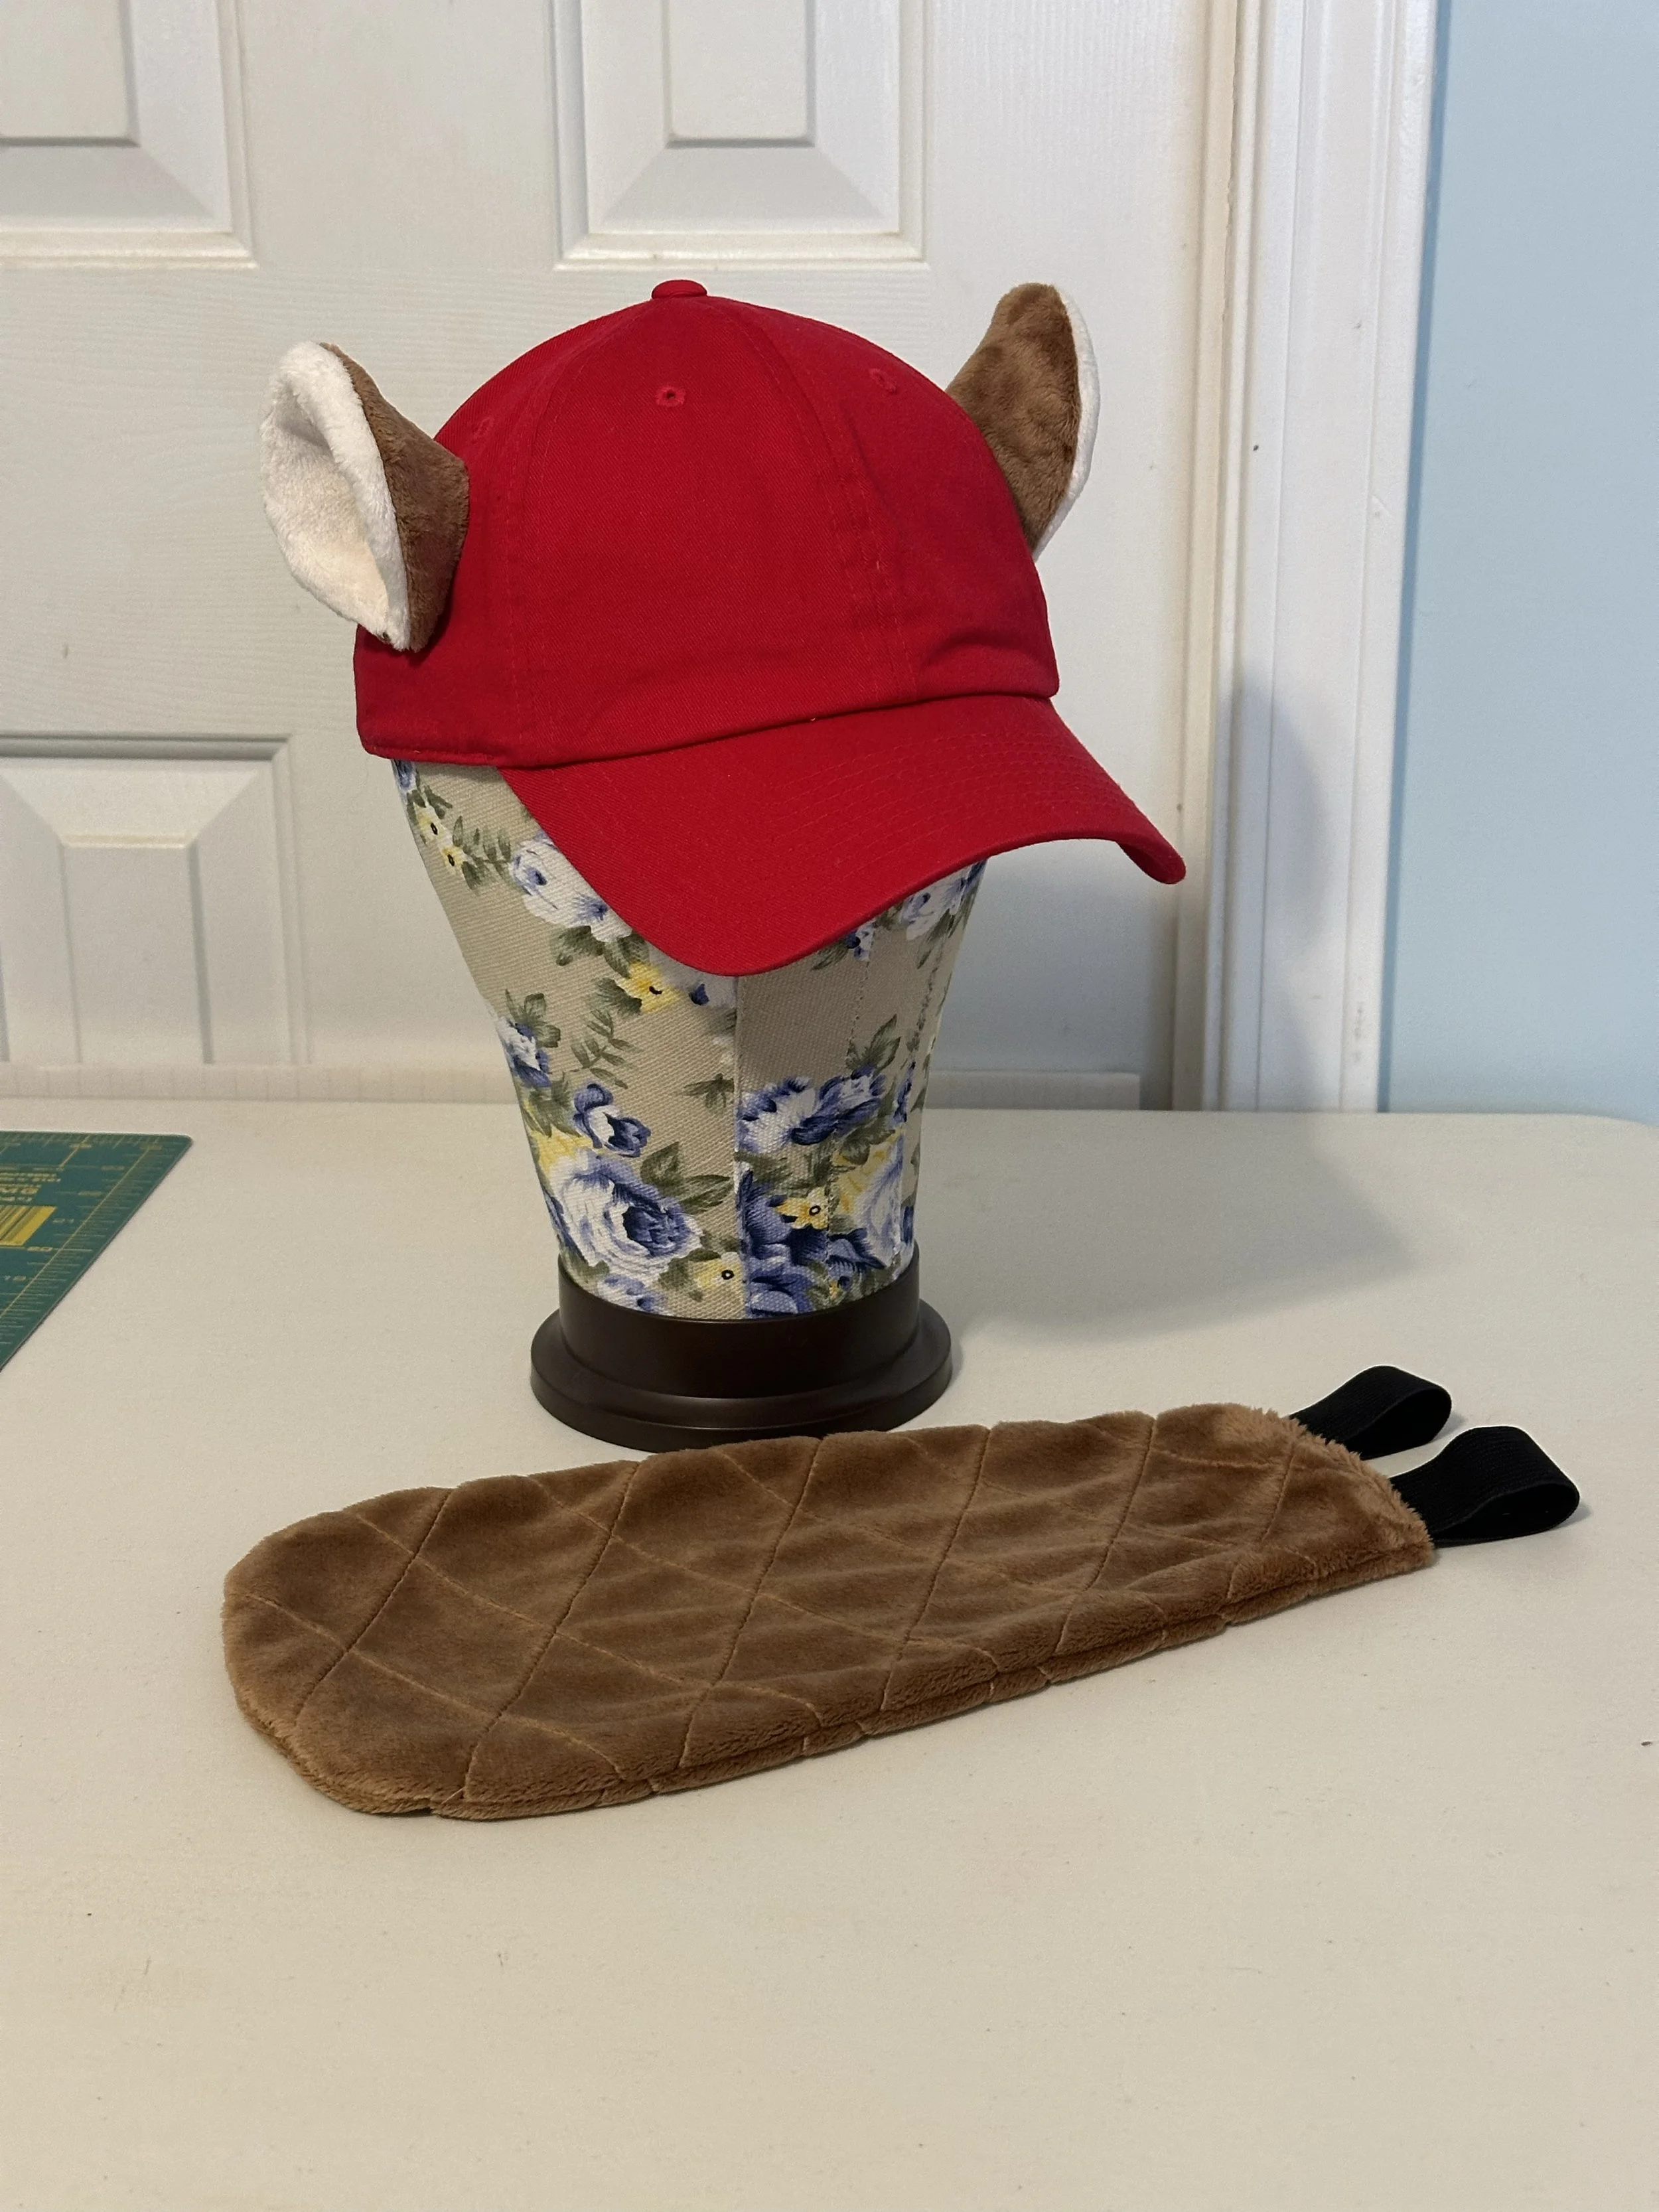
Easy DIY Bucee Beaver Costume
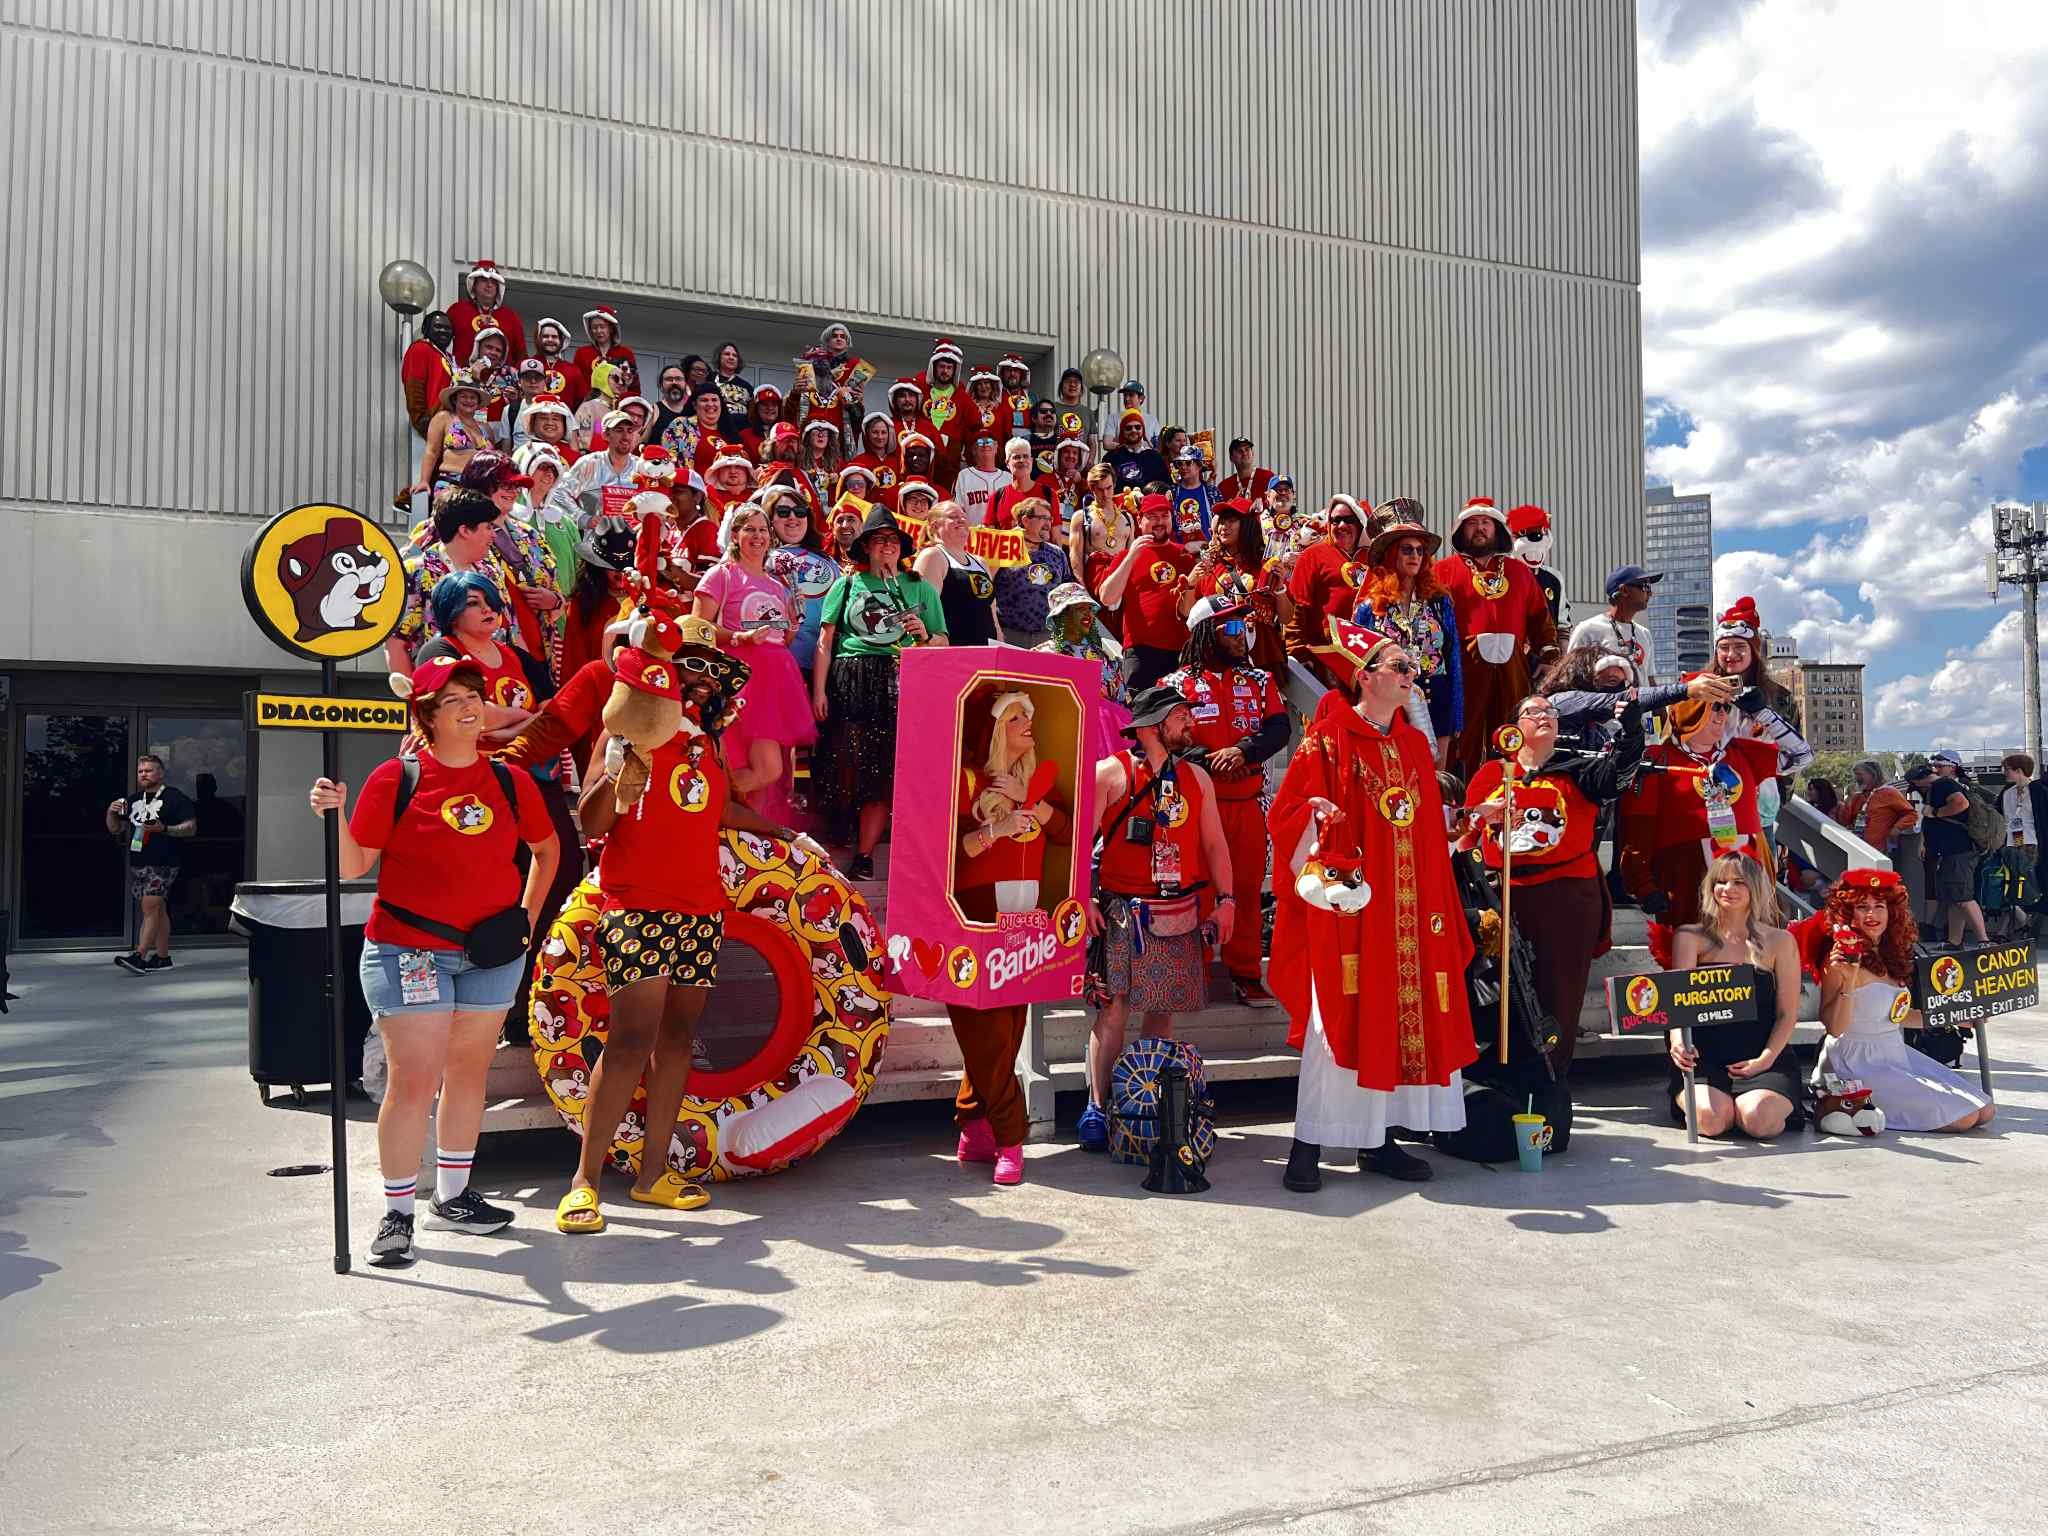
Planning on a costume but not quite sure what to make? For a convention I created some simple Bucee Beaver accessories for a fan gathering that were a hit. With many asking how I made them, below is a quick tutorial on how I made these accessories that pair perfectly with any Bucee shirt you own.

What you’ll Need
Materials
A Red Hat
Brown and White Fabric (I used Minky Fur. I ordered my fabric online which had a minimum of a yard when ordering. But I only used about a foot/ foot and a half of fabric to make the ears and tail.)
Elastic (I used 1” Black Elastic)
Craft Foam (Any size thickness of craft foam. I used some 4mm foam I had lying around.)
Sewing Supplies
Hot-Glue Gun and Glue Sticks
Instructions
Making the Ears
Step 1
I started by drawing out an ear pattern that was shaped like Bucee’s ears. His ears are shaped like half ovals. When creating the pattern, be sure to leave yourself enough seam allowance. I work with a 1/4” seam allowance so adjust accordingly if you use more.
Step 2
Take the ear pattern and trace it onto your fabric (both the brown and white fabric) of choice. I used a sharpie for this step as the fabric I was working with was thick and wouldn’t show through. But in most cases I usually use chalk or a pen. If using fur make sure the the direction of the fur is facing the right way when laying down your pattern.
Step 3
Cut out the fabric following the the shape you have just traced to the fabric.
Step 4
Take one brown ear piece and one white ear piece and put them together so the fur ends are touching each other and only the back of the fabric is visible. Pin in place the fabric.
Step 5
This step will differ per person. This step you will sew your ear pieces together while leaving the bottom that will attach to the hat open. I used a sewing machine for this step. But you can also hand sew or hot-glue the pieces together.
If using hot-glue, instead of having the 2 ear pieces sandwich together where the fur is touching, reverse this to where the fur is facing out. Hot-glue the back edges together but not along the bottom. Leave the bottom piece open so the foam can be inserted.
Step 6
Once the sides are either sewn or hot-glues together, take apiece of craft foam cut out using the same template as the ears and insert the foam into the ear. This will help the ear to keep its shape.
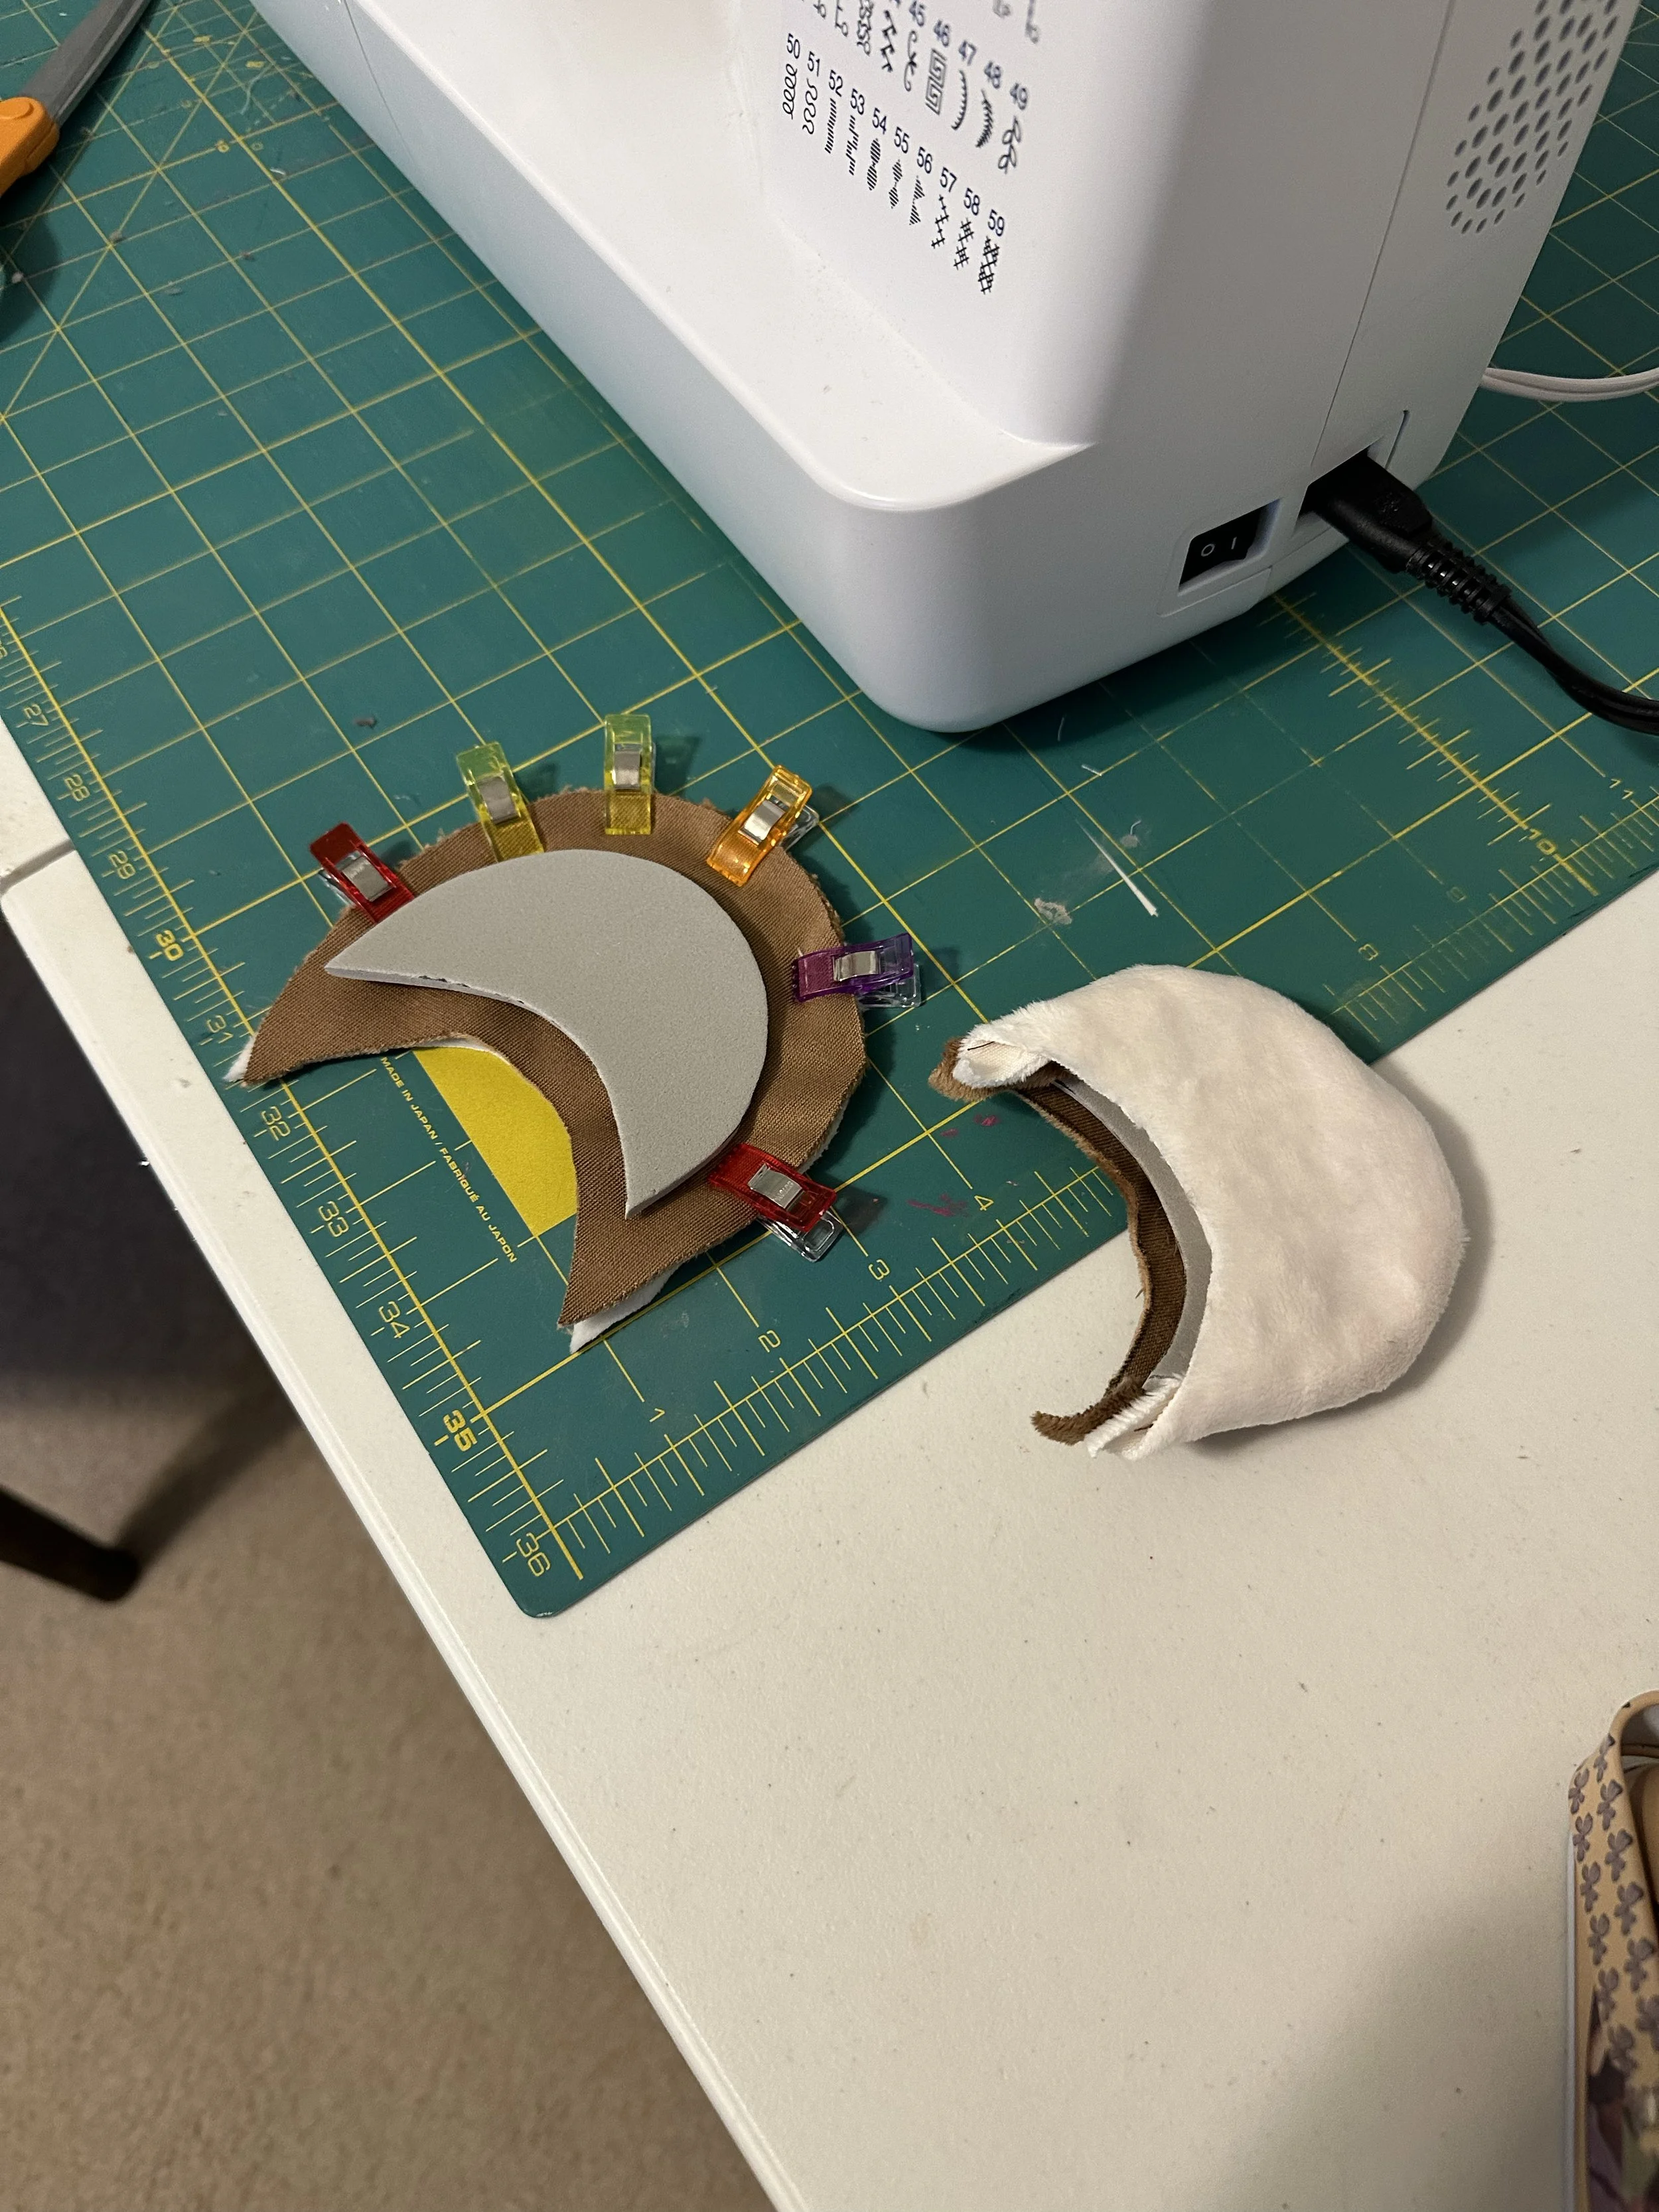
Step 7
Now that the foam is inserted into the ear, close up the bottom by either sewing or hot-gluing it closed
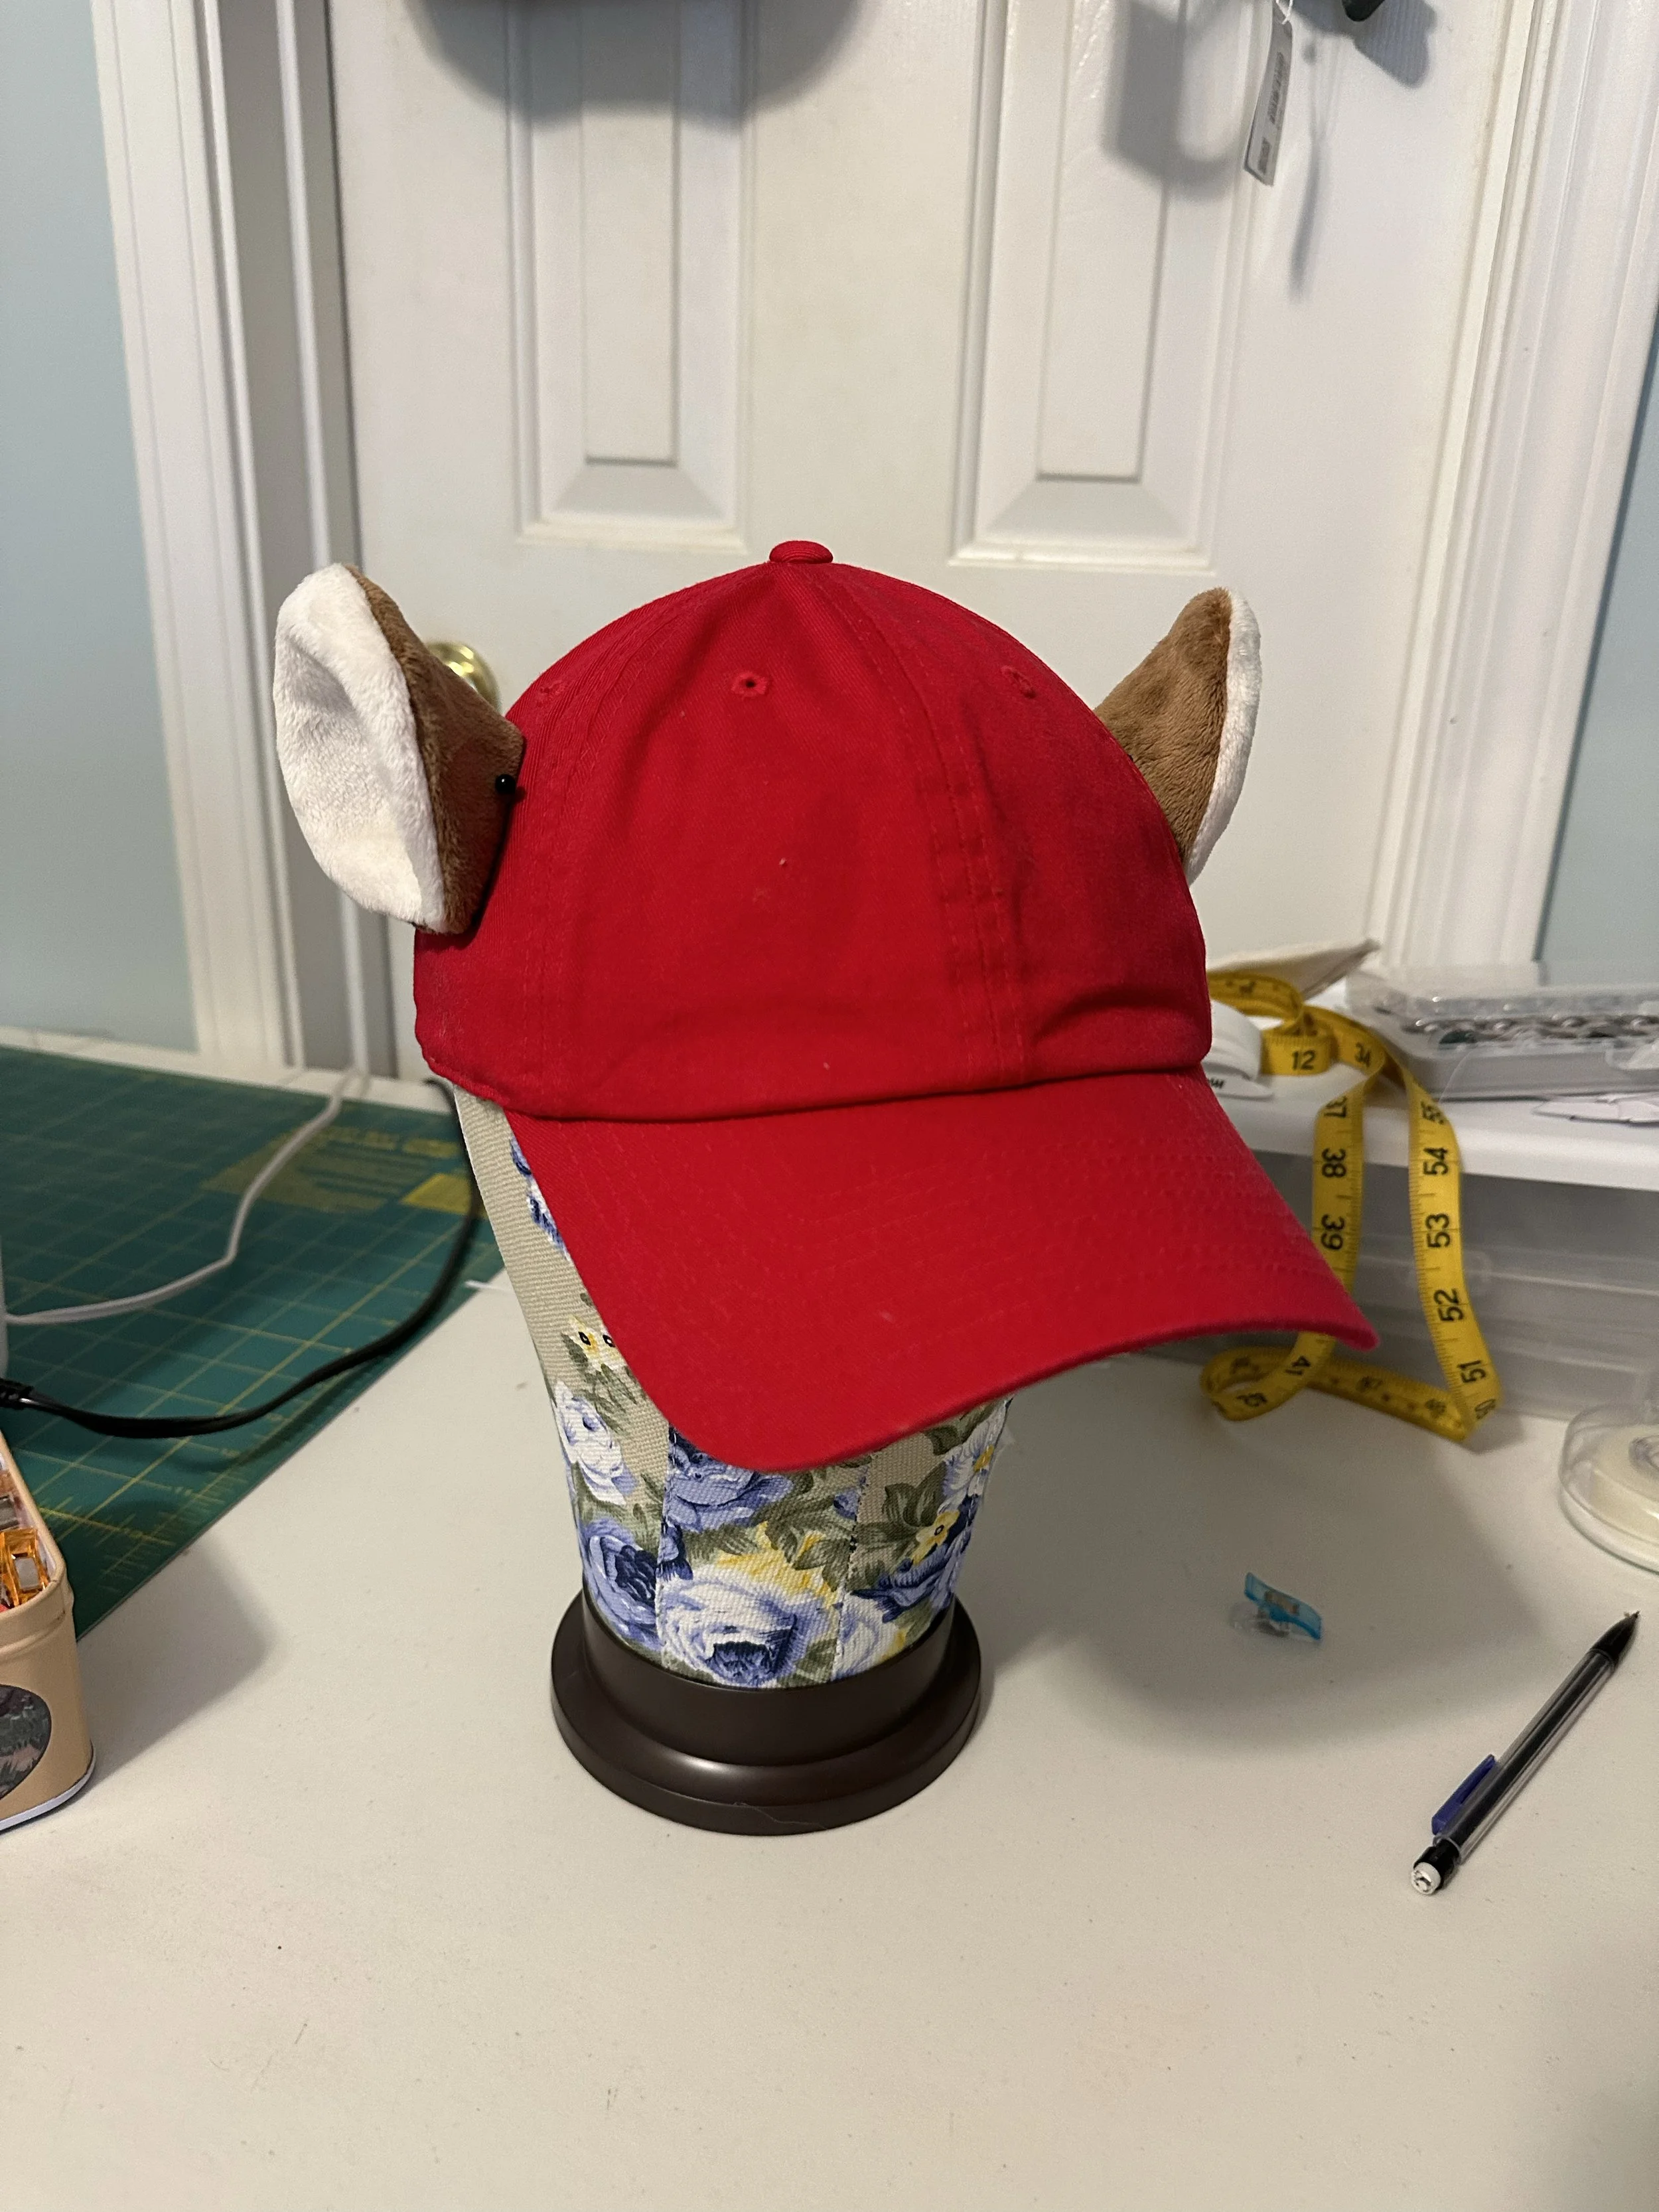
Step 8
The ears are now ready to be attached to the hat! I hand sewed mine onto the hat, but hot-glue can also be used to achieve the same results.
Making the Tail
Step 1
These instructions are identical to making the ears just minus the use of craft foam and it’s a different shape. I started by drawing out a tail pattern using references. When creating the pattern, be sure to leave yourself enough seam allowance. I work with a 1/4” seam allowance so adjust accordingly if you use more.
Step 2
Take the tail pattern and trace it onto your fabric of choice. I used a sharpie for this step as the fabric I was working with was thick and wouldn’t show through. But in most cases I usually use chalk or a pen. If using fur make sure the the direction of the fur is facing the right way when laying down your pattern.
Step 3
Cut out the fabric following the the shape you have just traced to the fabric.
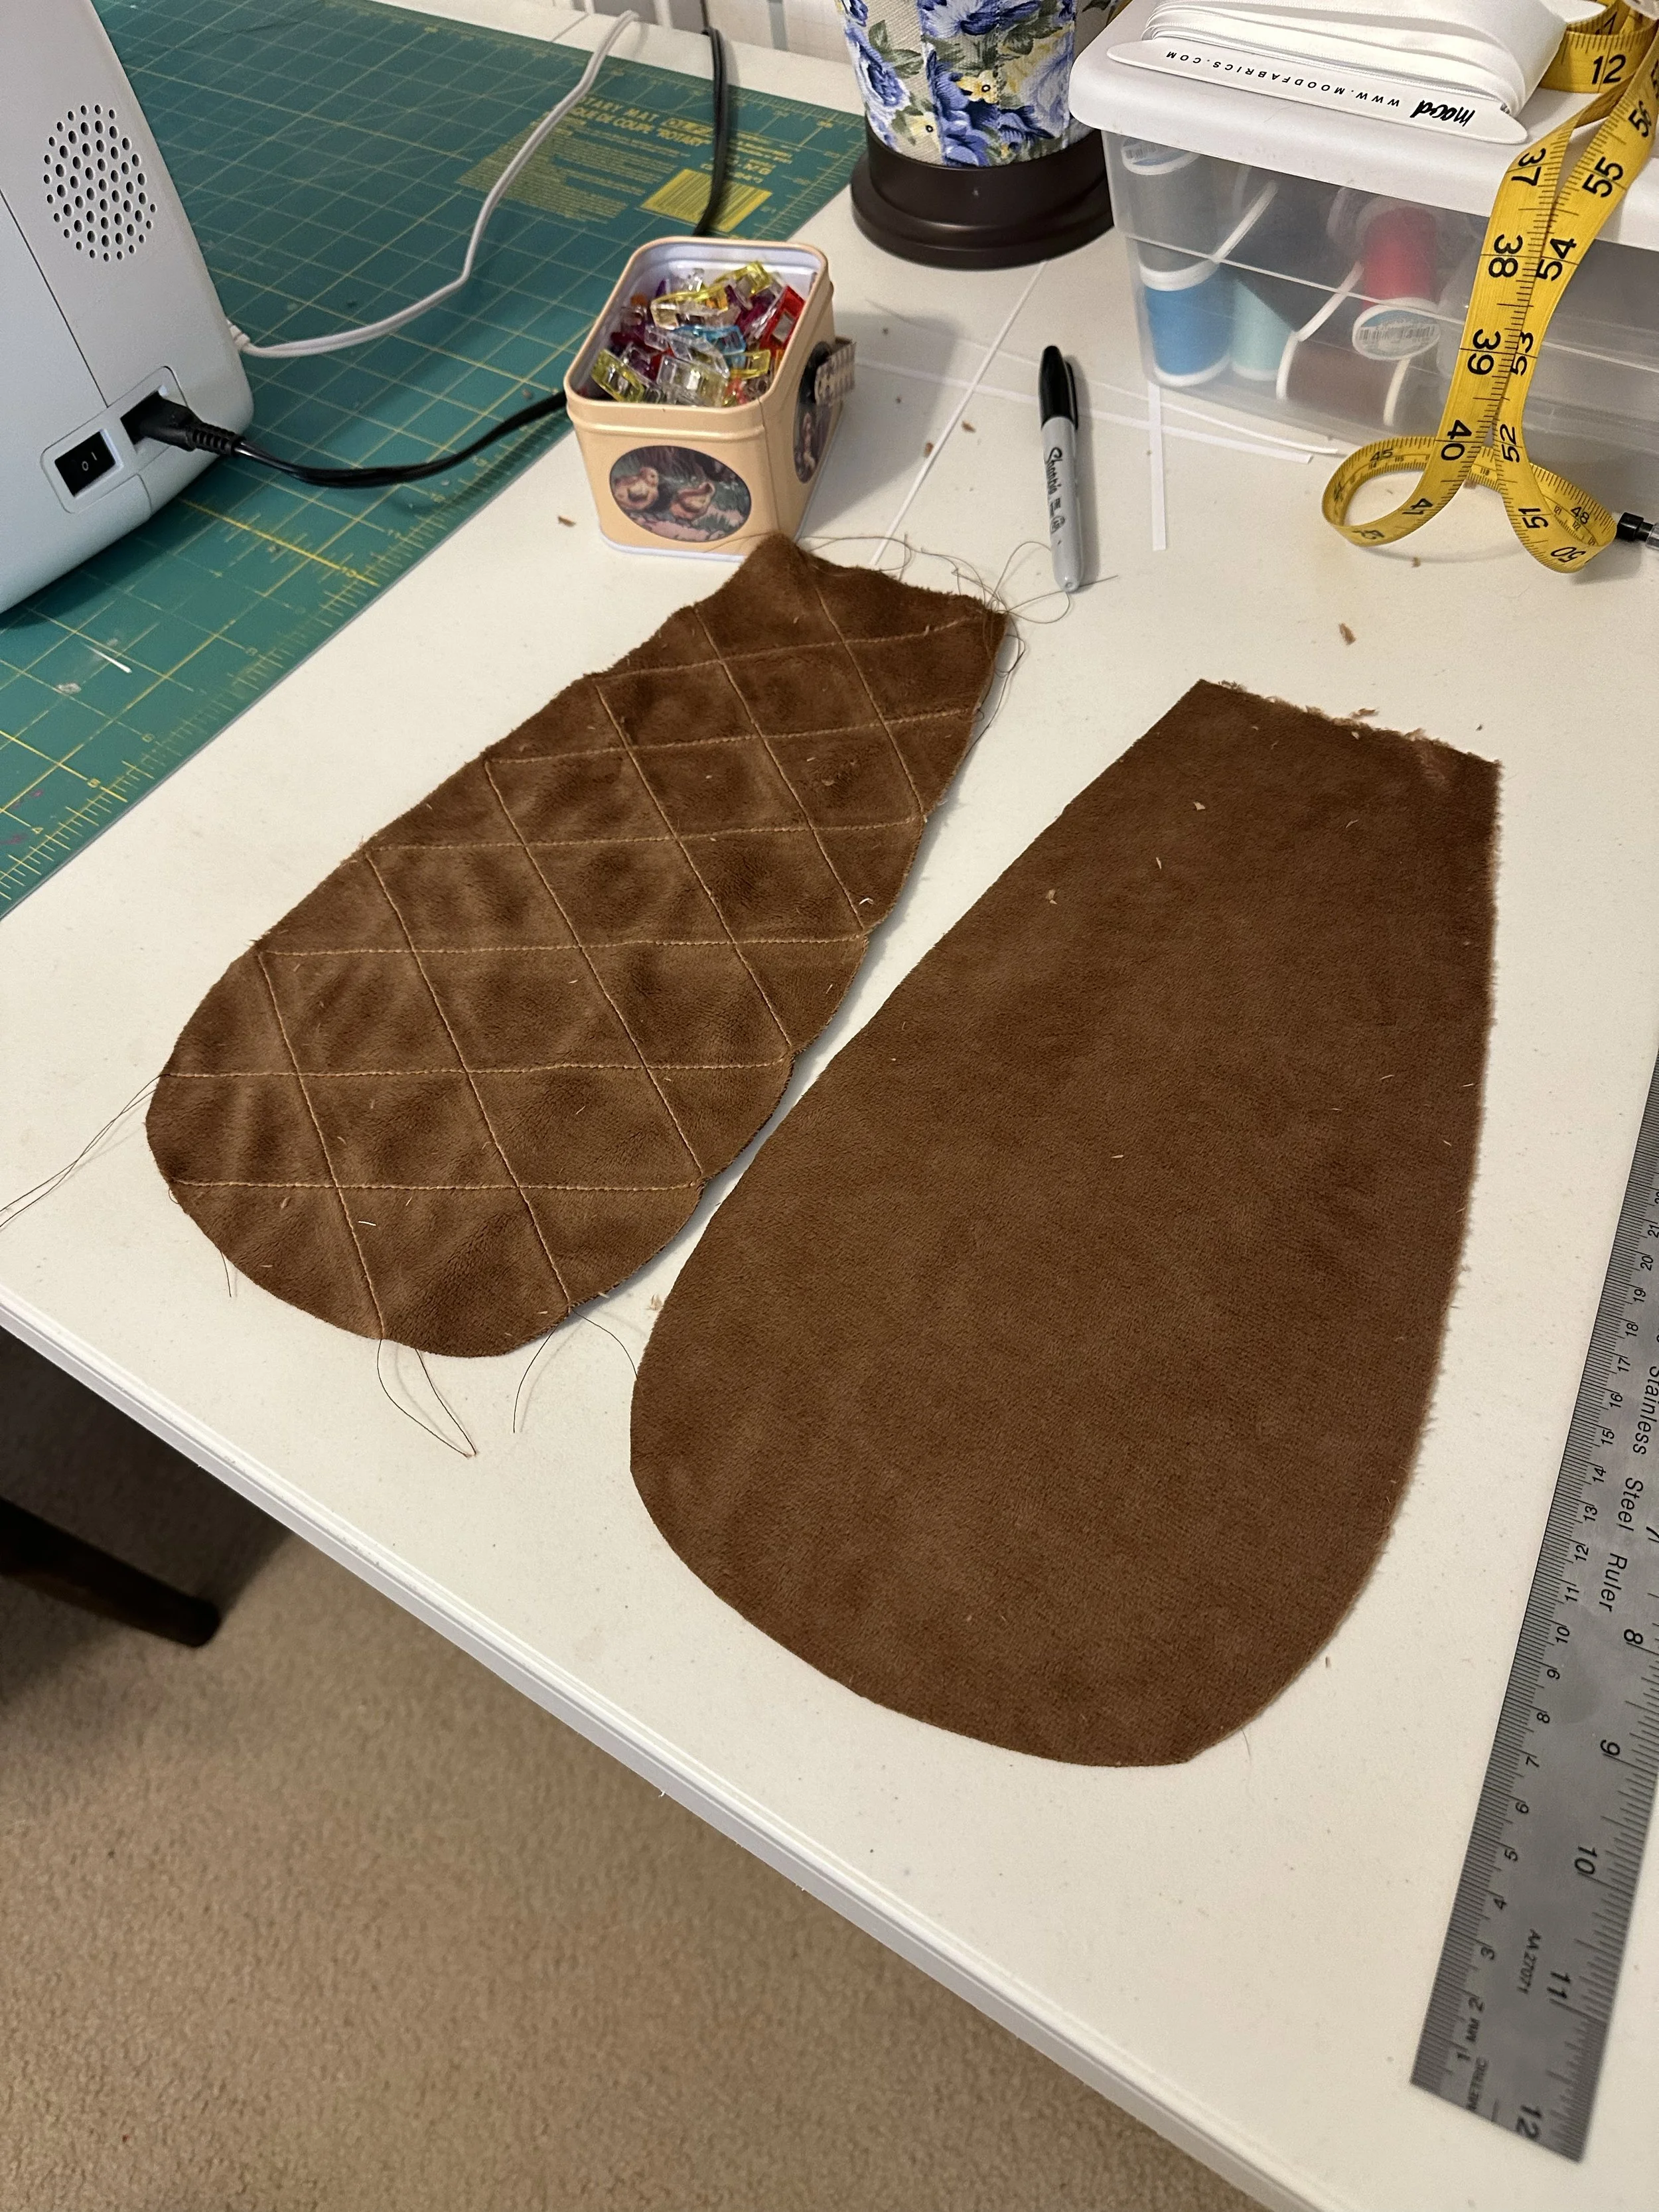
Step 4
Before sewing the 2 pieces together, I used my sewing machine to create a topstitch across the fabric to create lines like those on a beaver’s tail. This step can either be done by hand or using another method such as markers if you prefer.
Step 5
Taking the pieces that now have lines through it, put them together so the fur ends are touching each other and only the back of the fabric is visible. Pin in place the fabric.
Step 7
This step will differ per person. This step you will sew your tail pieces together. I used a sewing machine for this step. But you can also hand sew or hot-glue the pieces together. Make sure to leave the end open where the tail will connect to your belt so that elastic can be added.
If using hot-glue, instead of having the 2 tail pieces sandwich together where the fur is touching, reverse this to where the fur is facing out. Hot-glue the back edges together but not along the top. Leave this spot open so the elastic can be added.
Step 8
Take 2 pieces of elastic (I used 5” pieces.) and pin them in a loop to the opening in the tail. Once pinned, topstitch along the edge to both close the tail and attach the elastic at the same time. If using hot-glue, follow the same steps but with hot-glue.
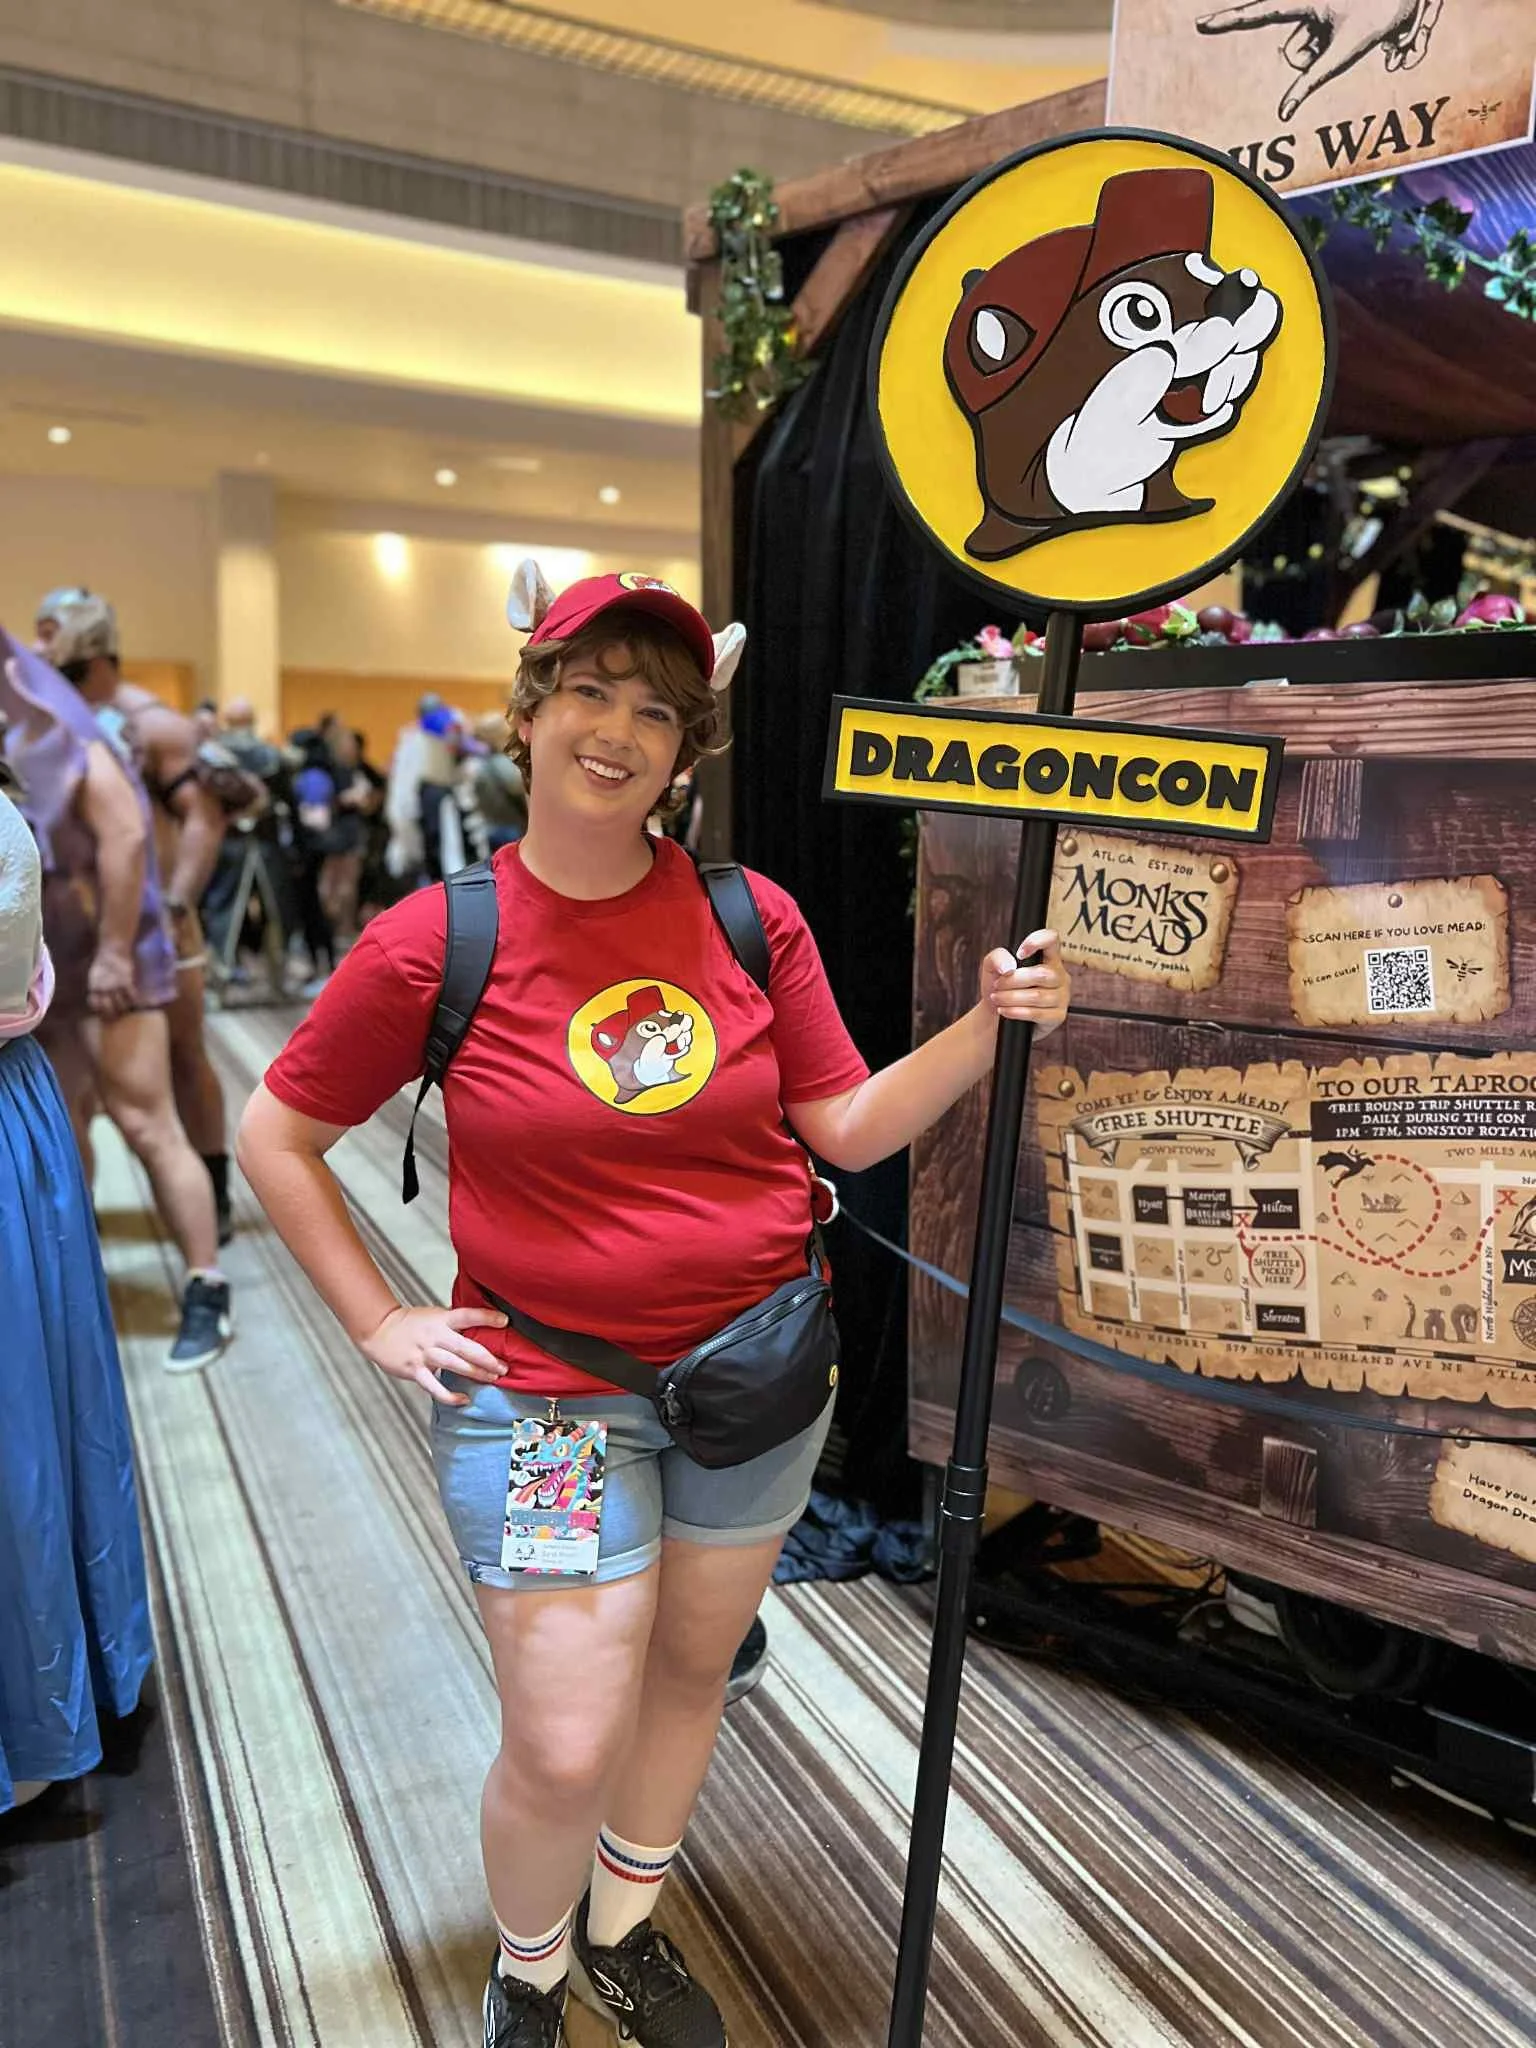
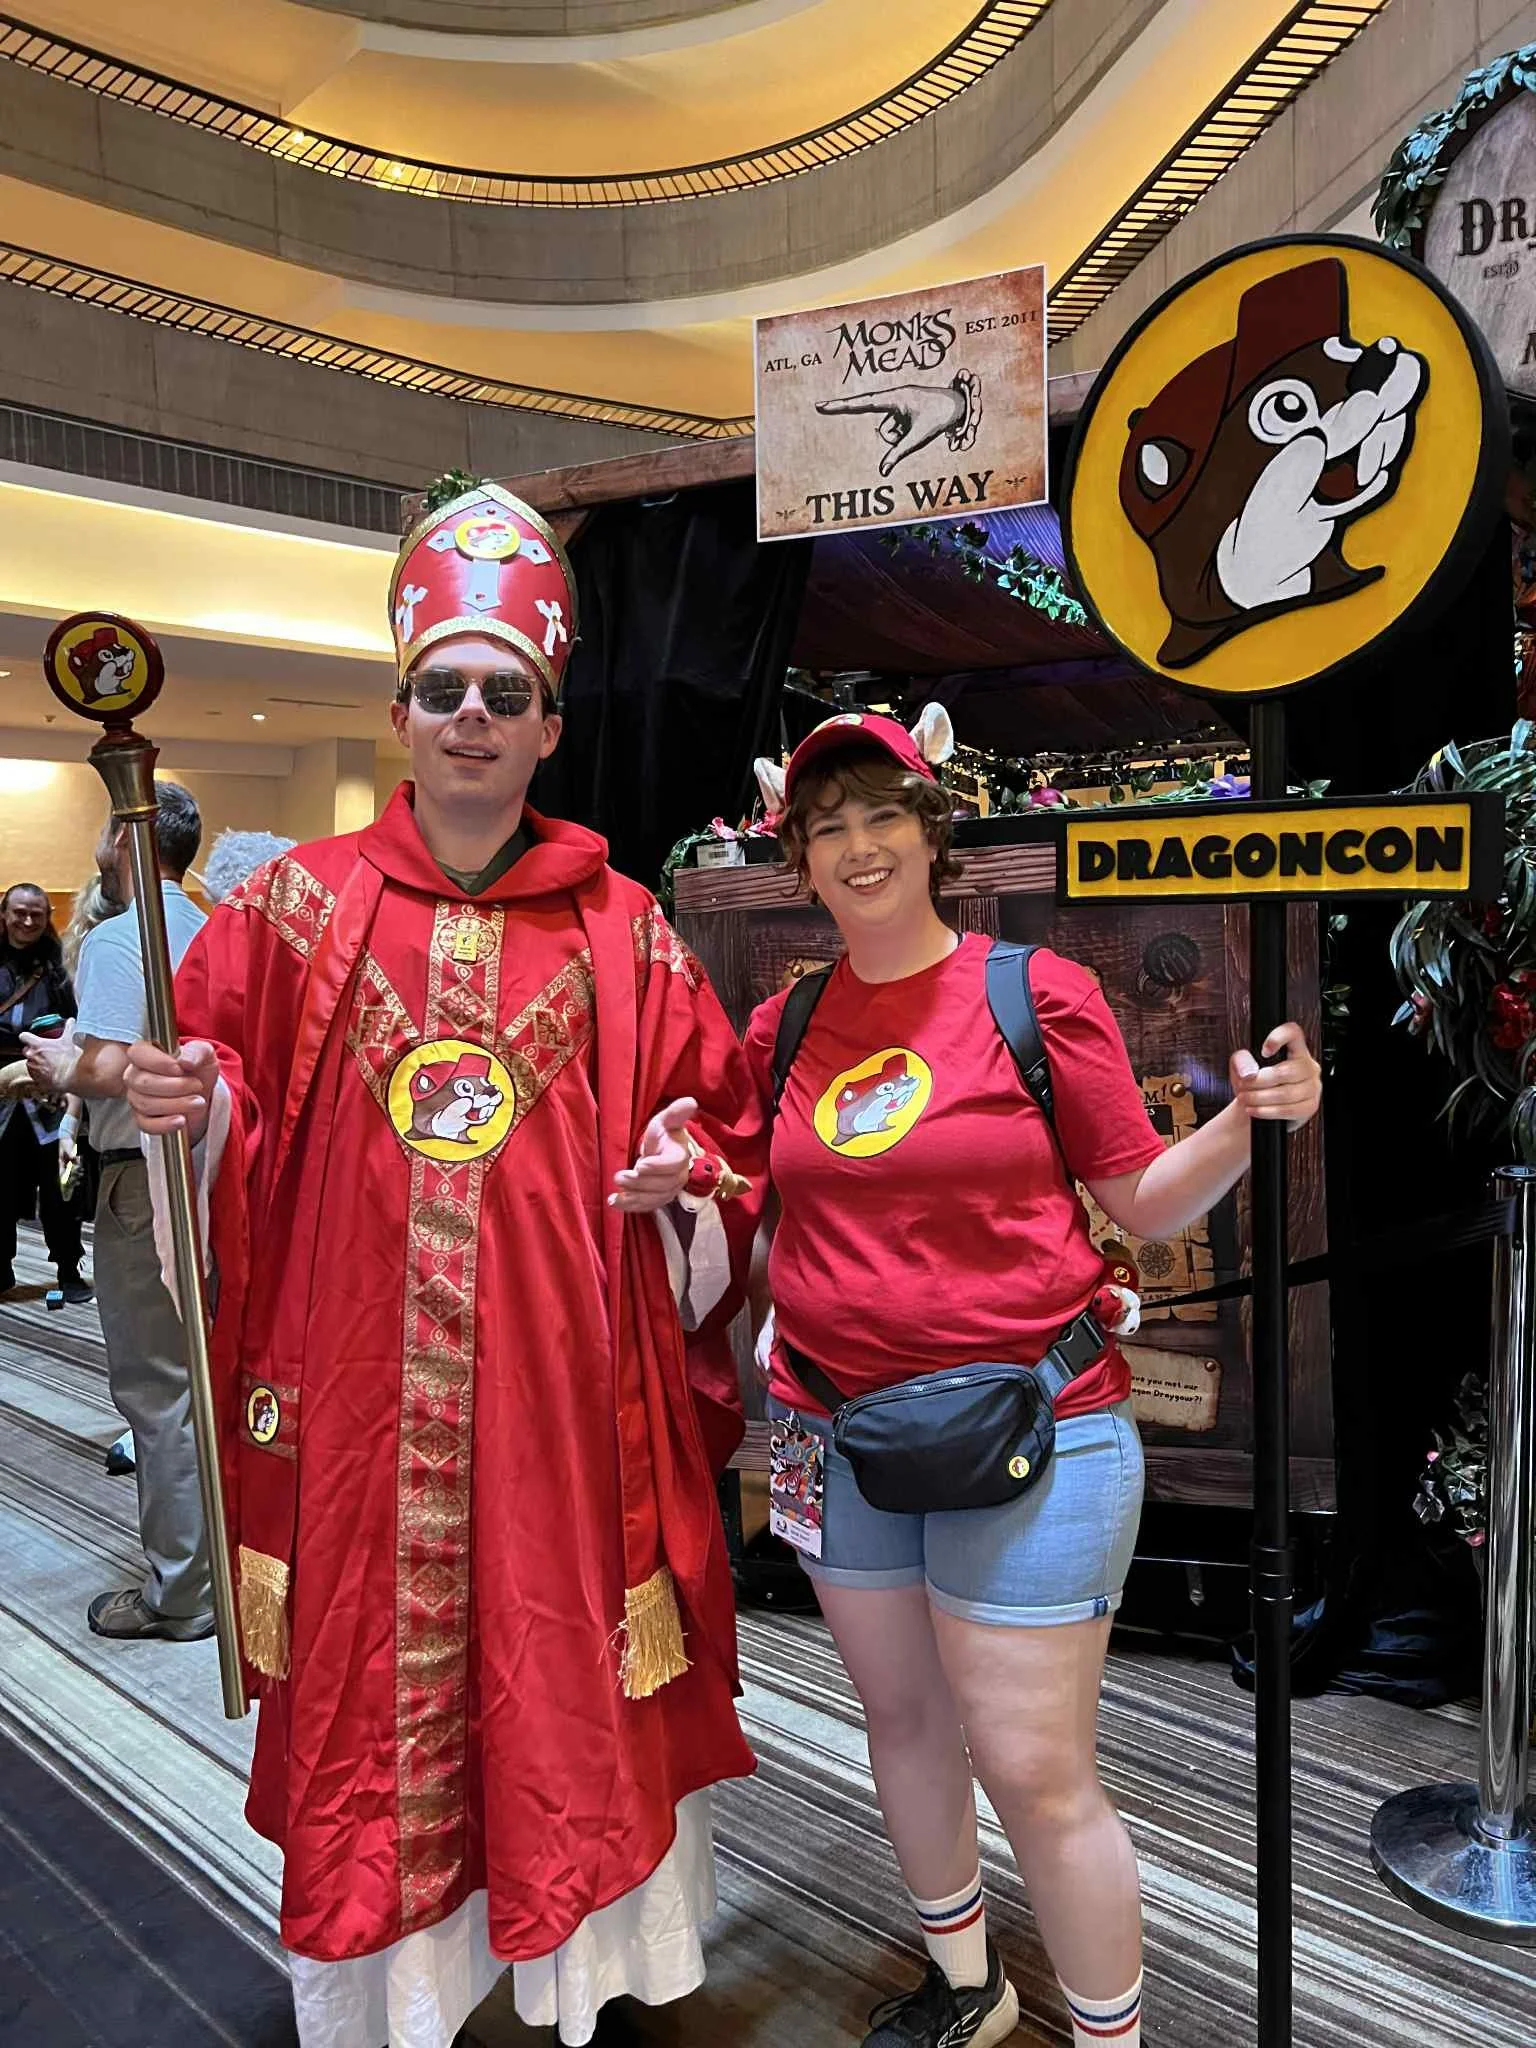
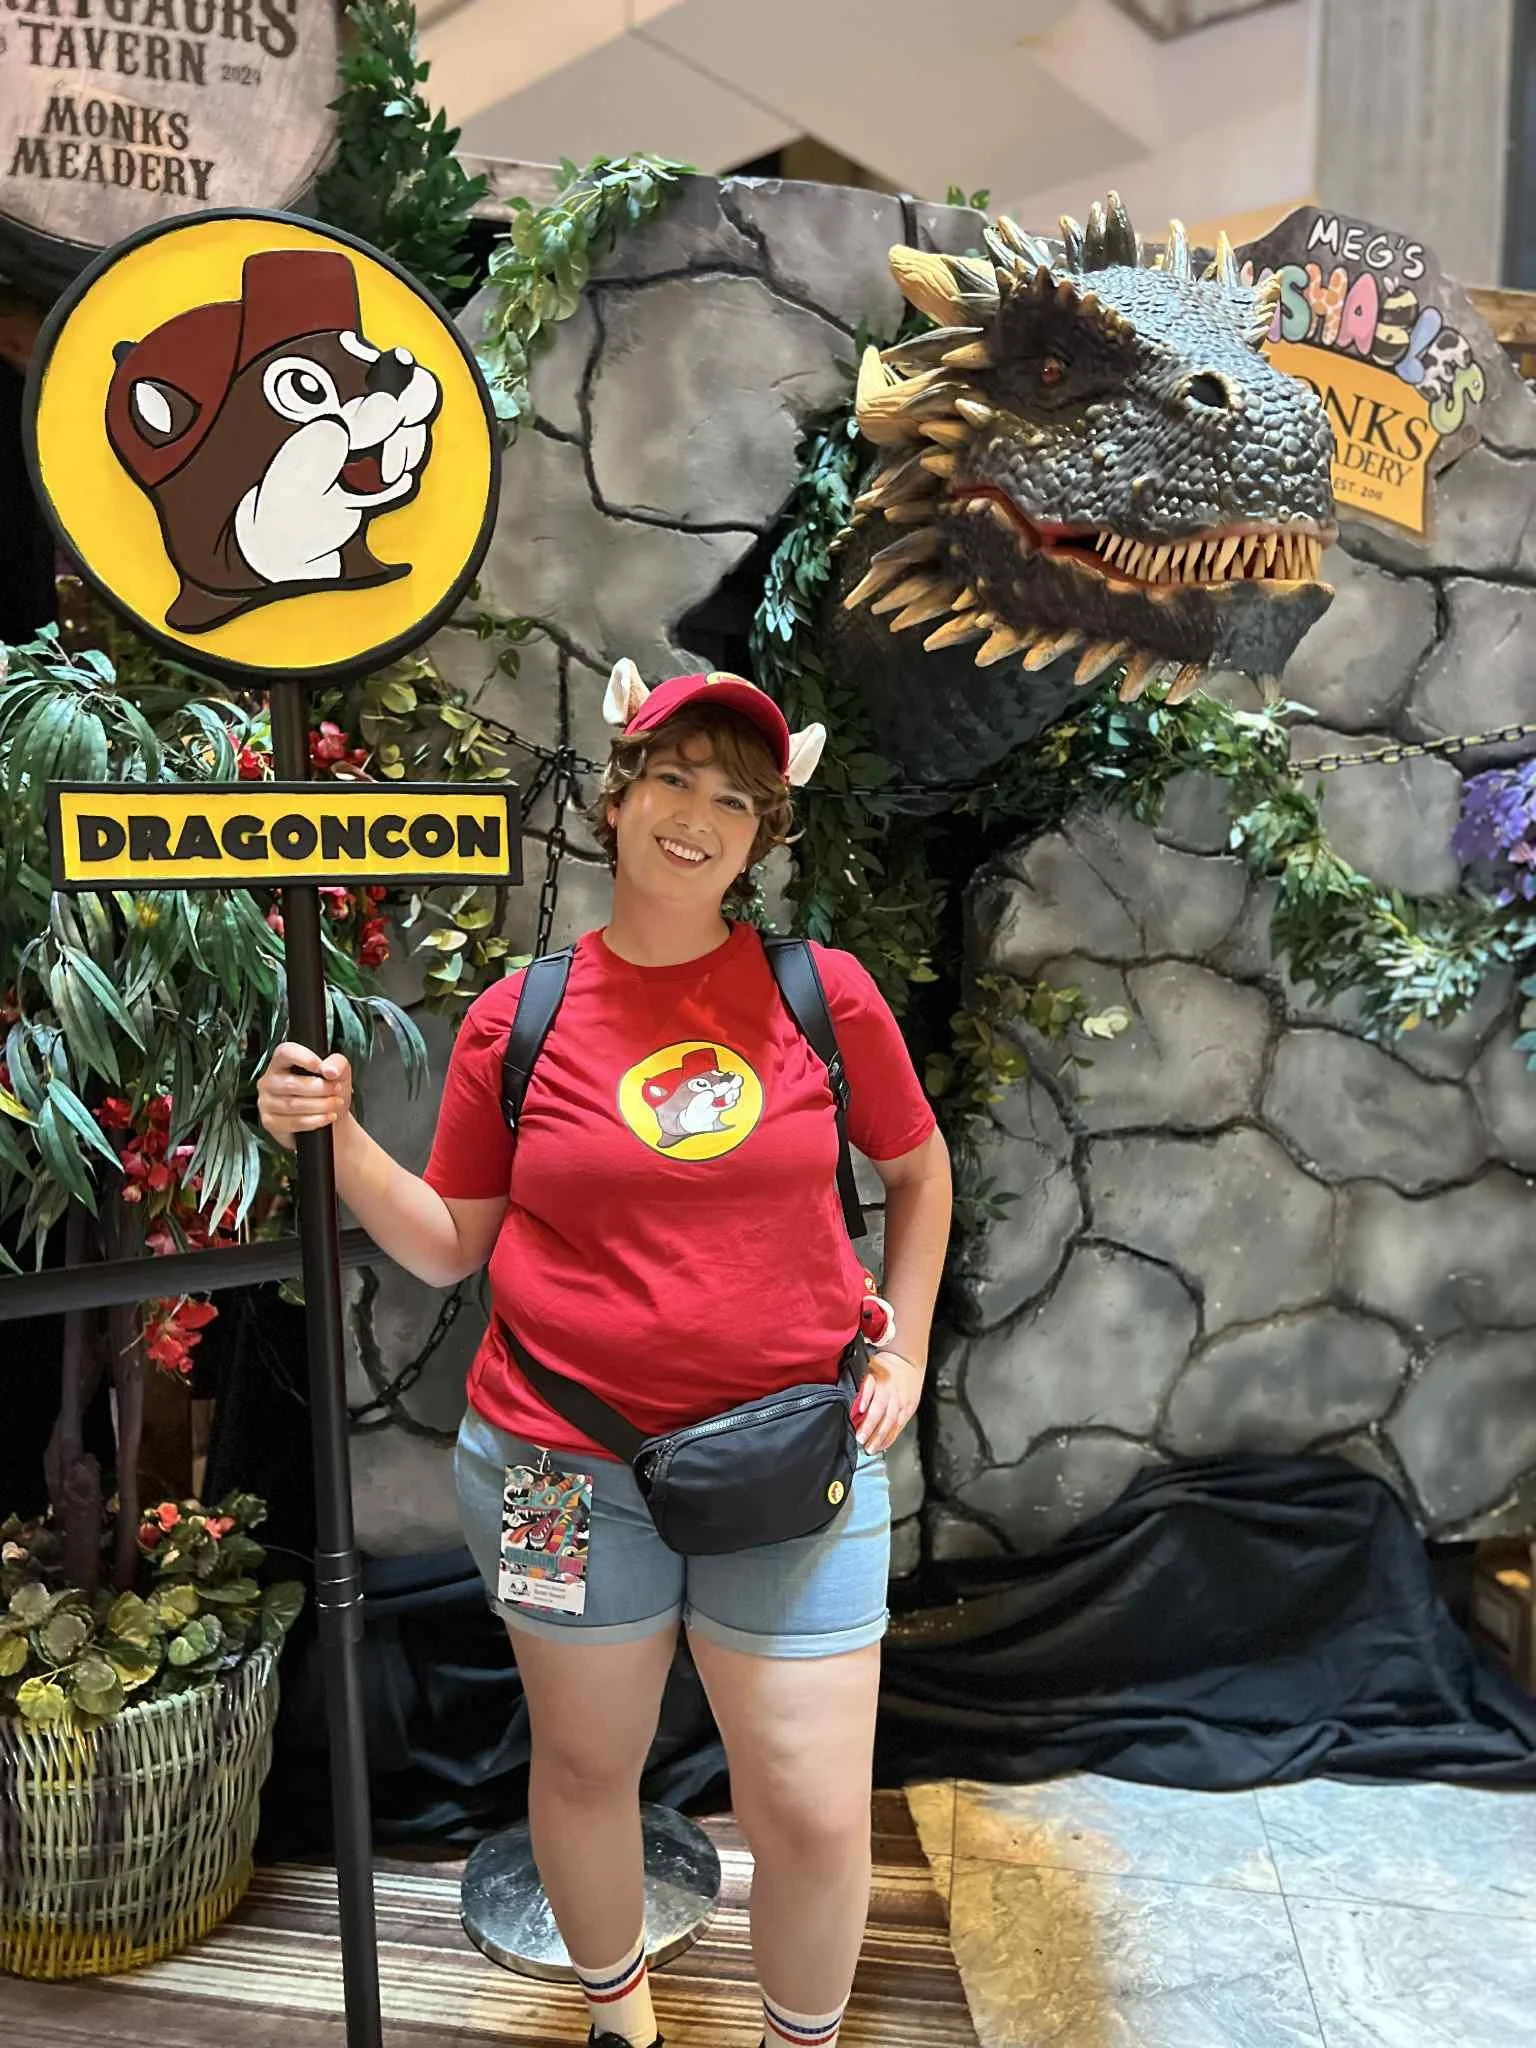
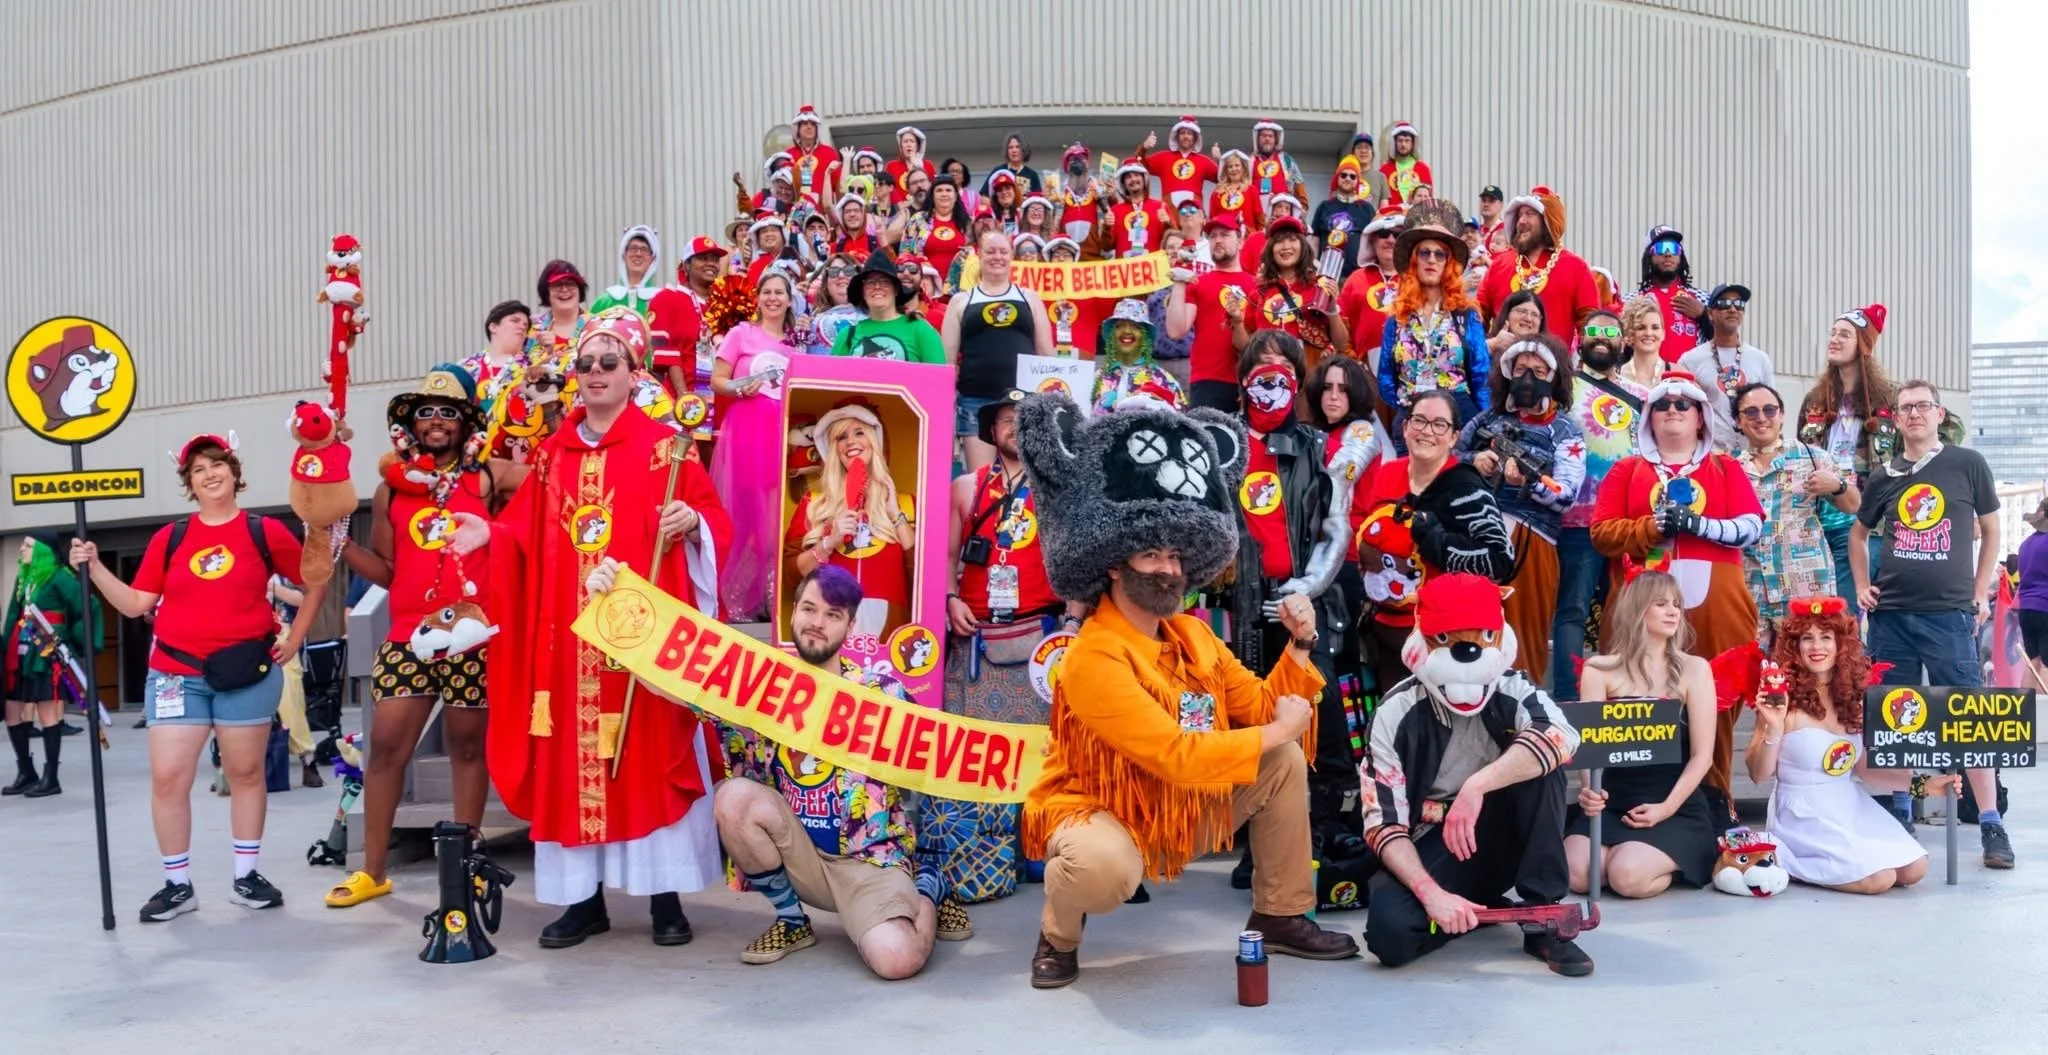
Final Product
This is one of the more comfortable and easy to assemble costumes I have made in awhile. The hat and tail are very easy to mix and match with any outfit and people who know who Bucee is get a kick out of it.
Bellow are some pictures of the costume all together. For the convention I went to I also created a a Bucees location sign that had the name of the convention as the location. (So in this case it says “DragonCon”.) I plan to add a write up on how I created this monstrosity soon.