
Badge Ribbons: How to Make Them
What are Badge Ribbons
Badge ribbons are small pieces of imprinted ribbon that attach with an adhesive strip to the bottom of your membership badge or to the bottom of the next ribbon in the chain. They are a tradition at many science fiction conventions and have been finding their way back to conventions such as DragonCon.

About Badge Ribbons
Badge ribbons are a fun way to add your unique flair to your convention experience, but they are not a requirement for enjoying the con.
Most badge ribbons are created by fellow attendees outside of the convention. Badge Ribbons come in a wide range of styles and colors and it’s entirely up to the individual to create and distribute their own badge ribbons.
Where to Start
The first thing you are going to want to think about when making badge ribbons is: what are they for and what kind do you want.
There are 2 types of badge ribbons which are the following:
One Color Print (Most Common)
Sublimation Print - Multicolor/Full Color Print
Badge ribbons can also come in different sizes with the most commonly used being 4’’x1 ⅝’’.
For DragonCon I suggest going with the 3 ½ ’’x1 ⅝’’ size so your ribbon does not run off the badge.
Badge ribbons for conventions are made for many occasions including:
Costume Specific Ribbons
Group Specific Ribbons
Event Ribbons
Convention Specific Ribbons
Series Specific
Advertising Ribbons (Cosplay Pages, Photography Business, ect…)
Think of what you want your badge ribbon to be, what its purpose is, and how will you go about handing them out. This helps to identify how many you need, what type of print you want, and possibly what design.
Set Up for Custom Ribbons
Designing a badge ribbon can be very challenging. When working with a small canvas, text becomes harder to read and imagery can get lost.
** Many websites offer you the option to upload the text and imagery you would like on the ribbon and to let one of their designers make the ribbon for you. **
Or if you would like to design it yourself, here is how to go about it:
In either Photoshop, Illustrator, or a software of your choosing, create a file that is 3.4"x0.9" for size 4’’x1 ⅝’’ or 3"x0.9" for size 3 ½ ’’x1 ⅝’’ with a resolution of 300 DPI (always double check with the company you plan on ordering from for dimensions). If you would like a larger canvas to work with you can also use 11.3"x3" for size 4’’x1 ⅝’’ or 10"x3" for size 3 ½ ’’x1 ⅝’’.
These dimension guarantees nothing in your design will be cut off from either the adhesive or ribbon edges
Create your design making sure to only use black with a transparent background
When done, convert your text into objects and save out your file according to your ribbon website (ex: some only accept .ai files while some will accept .jpeg, .png, or .pdf)
Double check with the website you are ordering from for exact files they accept
Your artwork should look like the one below. The red outline is the edge of the canvas.

Uploading to the Website
Now that you have your design done, to the correct file size, and in Black with Transparent Background (or Black and White image), it’s time to upload it to the website!
Normally sites will let you preview your design online before placing your order to make sure the color combo you are going for will work along with the placement of your design.

Below is an example of one of my ribbon designs and the different color combinations I looked at. I originally had planned on the black ribbon with a gold foil. But after trying different colors ended up going with the yellow ribbon with the red foil as it was much easier to read.
Don’t be afraid to get creative with your colors and to see what works and what doesn’t work.

Proofing and Approvals
Once the order is placed you are not quite done yet. Depending on where you order is how the next few steps will go. But for the most part they are all very similar. Once you have placed your order you will receive a confirmation email letting you know that they have received your order. But following that email you will always receive a second email from one of their designers with the “Final” proofs for you to view and make sure everything is correct.
Depending on the site you order from they may or may not start production until you email them back. For example, PCnametags requires you to sign a waiver of the proofs before they begin production. But RibbonsGalore does not require a waiver and will begin production of your ribbons the next day unless you report an issue to them.
Mail Day
After any waivers have been signed and proofs have been reviewed and all looks good, next is the waiting game. On average I usually receive my orders with 2 weeks of placing my order but it has been 3 weeks before when I ordered during a busy time for the ribbon companies.
Once production of your ribbons is done you will receive an email that your ribbons have shipped. And once they arrive it’s time to admire the work you have done!
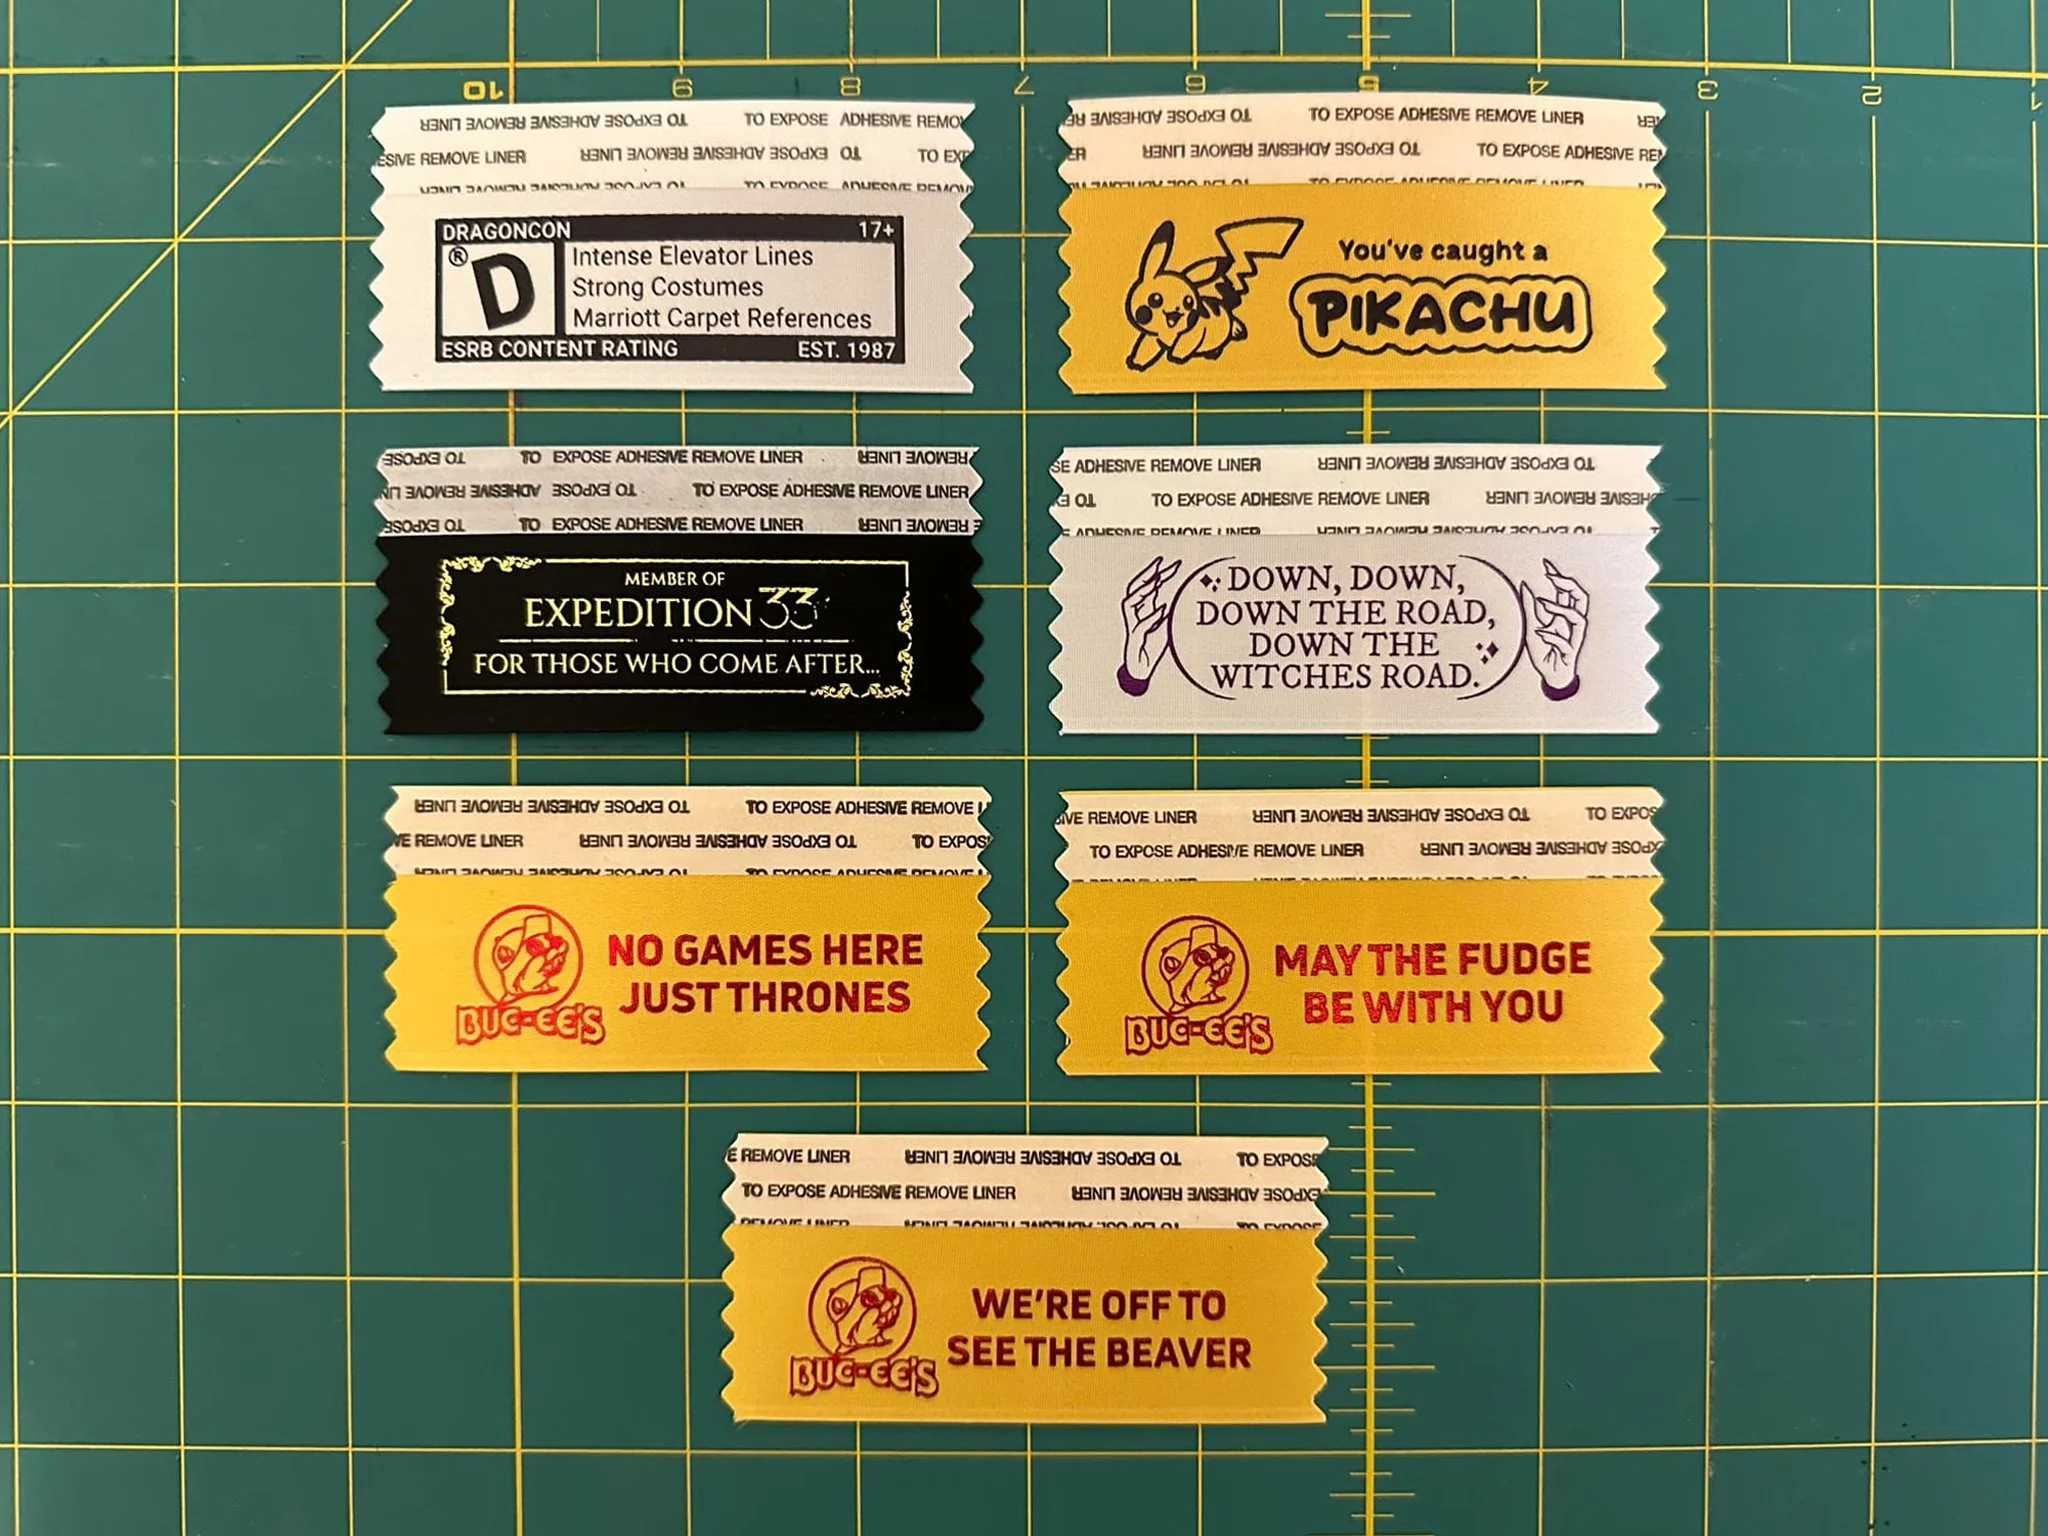
Below is an example of a recent order I placed from RibbonsGalore.
Where to Buy
PC Nametags - https://www.pcnametag.com/
Ribbon Colors: 37
Print Colors: 16
Order Minimum: 10
Setup Fee: None
Price for 100: $43
File Types: PDF, EPS, AI, JPG, and PNG
Ribbons Galore - https://www.ribbonsgalore.com/
Ribbon Colors: 33
Print Colors: 8
Order Minimum: 10
Setup Fee: None
Price for 100: $50
File Types: PNG
Marcos Promo - https://www.marcopromotionalproducts.com/
Ribbon Colors: 39
Print Colors: 14
Order Minimum: None
Setup Fee: $14
Price for 100: $48
File Types: AI, EPS, CDR
Hodges Badge Company - https://www.hodgesbadge.com/
Ribbon Colors: 36
Print Colors: 12
Order Minimum: None
**NOTE** Orders must be a minimum of $40 to place an order
Setup Fee: None
Price for 100: $40
**NOTE** Can not do imagery. Only text. Best place to do Full Color.
File Types: PNG, JPG, GIF, TIF, PSD, AI, PDF, EPS, SVG, DOC, XLS, CSV, TXT
How to Make Your Own
Is it too last minute to order your ribbons? Do you want more colors than what the websites offer? Here's how to make ribbons at home!!
Follow the Facebook link below to an album that will walk you through step-by-step on how someone made their own badge ribbons.
Link: https://www.facebook.com/pokemonmasterkimba/media_set?set=a.10212046778871269&type=3
